Course Tools
When accessing the main view of the course, we will see the different content creation tools, as well as tools to interact with the student.
Tools can be hidden from the student, leaving only those we want to use. To change visibility, use the switch that accompanies each tool.
Course Announcements

Course announcements allow creating communications for users that will be displayed when they enter the course. When there is a new unseen announcement in any course, it will be shown to the user upon login without needing to access the course itself. The difference from the platform’s general announcements is that they will only be shown to users assigned to the course.
To manage announcements, click on “Manage announcements”.

They are configured in the same way as the platform’s general announcements (see article).
REMEMBER
Do not confuse them with the General Announcements. Course announcements are exclusive to the users of the respective course.
Description

The “Course Description” allows specifying the course objectives, evaluation criteria, methodology, etc., so that the student has a general idea about the course contents.
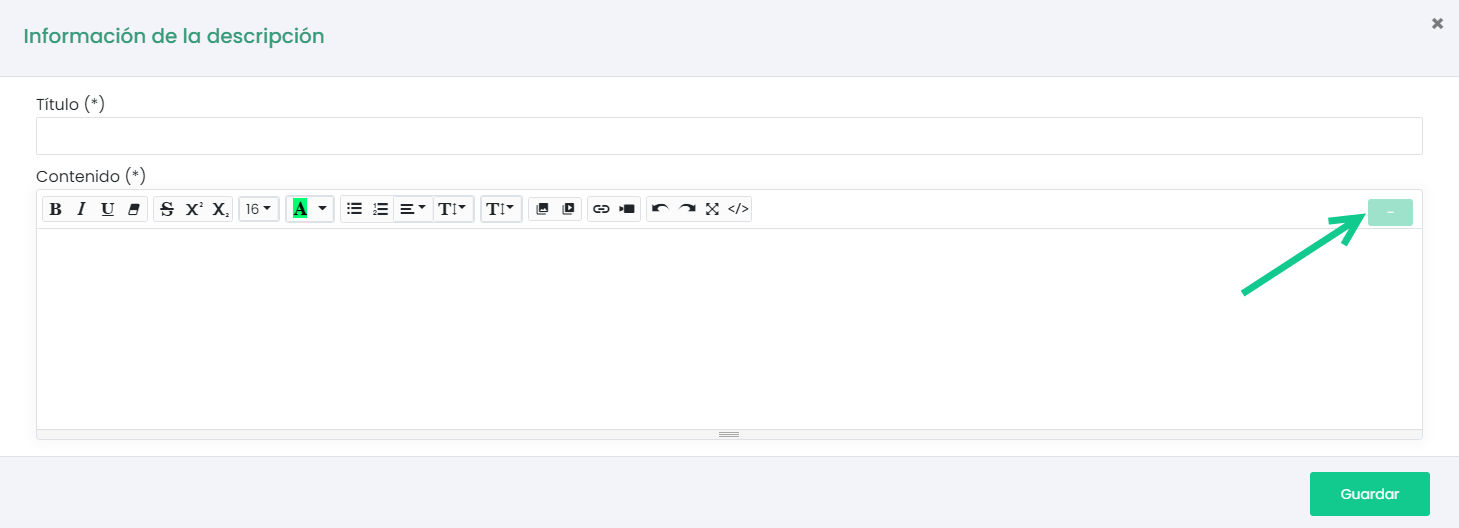
To add content, click on the “+ Create description” link.

Choose a title for the section (e.g., General Description, Objectives…) and fill in the content. You can create as many sections as desired.
REMEMBER
The platform allows you to format text, add images, videos, links, HTML code, and more through the extended editor. To access it, click on the indicated icon.
Lessons

This tool allows creating a list of components that dynamically show the course contents to the student. Lessons can contain slide presentations, videos, images, and audio, as well as SCORM modules. Within the Lessons tool, we can add other components to complement the course, such as exercises, surveys, links to websites, documents, Prezi, etc.
These elements can be configured as prerequisites for other elements, forcing the student to follow a specific path.
The platform will track the student’s progress in the different lesson components, and the course will not be considered completed until all components are finished.
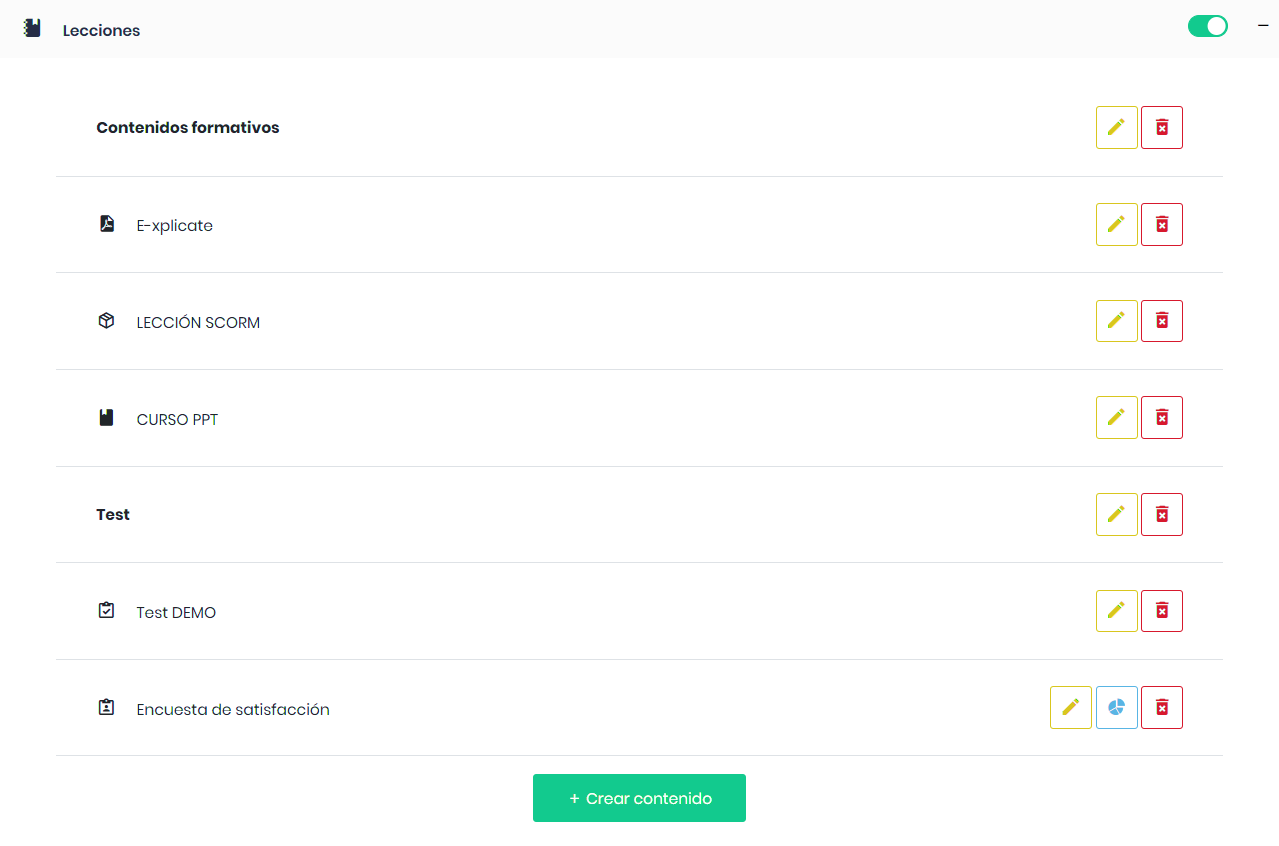
Clicking on “+ Create content” will show the components we can add to the lessons.
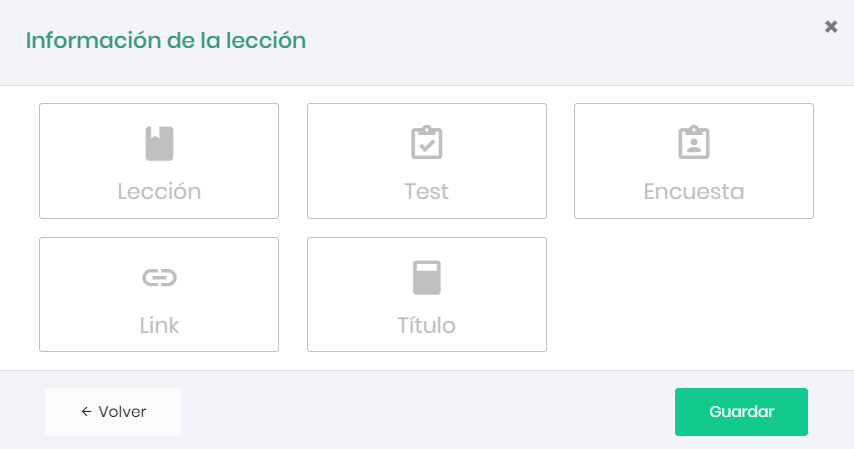
To learn more about lesson components, visit the Lesson Components section.
Pathways

This tool allows choosing a specific learning path based on the user’s class or responses to questions posed by the teacher. This way, we can group all the subject contents in a single course, and the user can choose which contents they want to view. For example, if we have a course with content in both English and Spanish.

Clicking on “+ Pathway Management” will show two tabs: one for Pathways and another for Questions.
First, we will define which components are assigned to each pathway and then configure which answers correspond to each pathway. To do this, click the Add button.

First, give our pathway a name (e.g., Spanish Language). If desired, we can choose from the drop down those classes to which this pathway will be automatically assigned.
Next, select from the list of components those components we want to add. Unselected components are shown in light color. Clicking on them will move them to the upper section and mark them in dark color. To deselect them, click on them again.
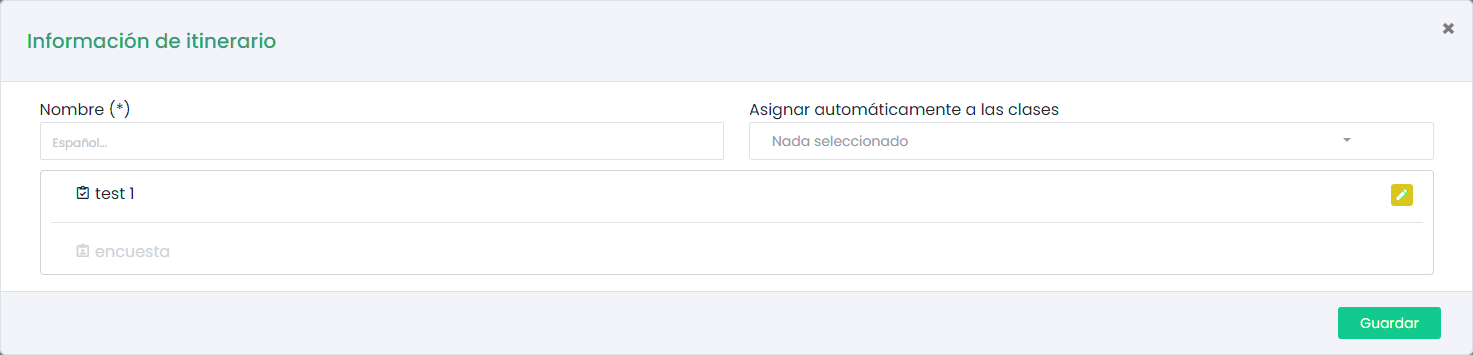
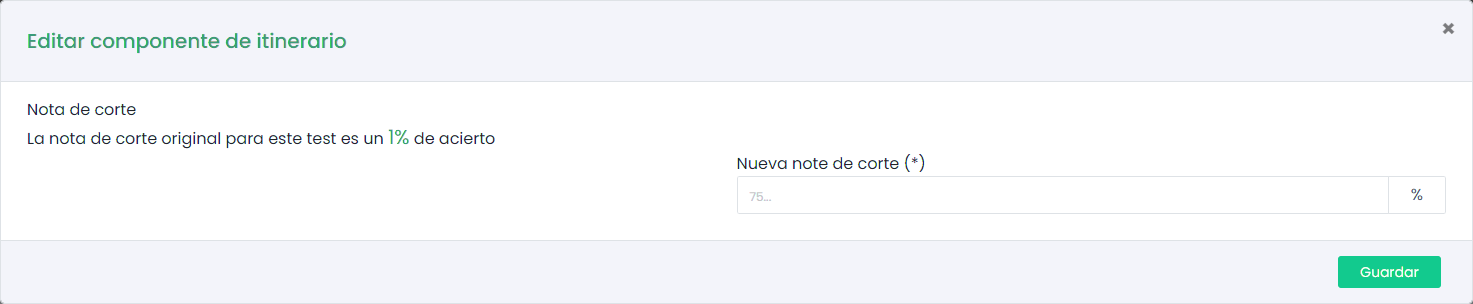
Some components, such as tests, can have variations depending on the pathway. For example, we can choose a different passing score for each pathway. This can be modified by clicking on the pencil icon that accompanies the component.
Once configured, click “Save”.
Next, we will define which answers correspond to each pathway. To do this, go to the “Questions” tab and click “Add”.
A modal will appear where we need to fill in several fields. The first is an identifier for the question, for example, course language. The associated question could be, “In which language do you want to view the course contents?”.
Some questions can depend on others. For example, if the language choice depends on the job position, we would previously configure that question to now select it from the dropdown.
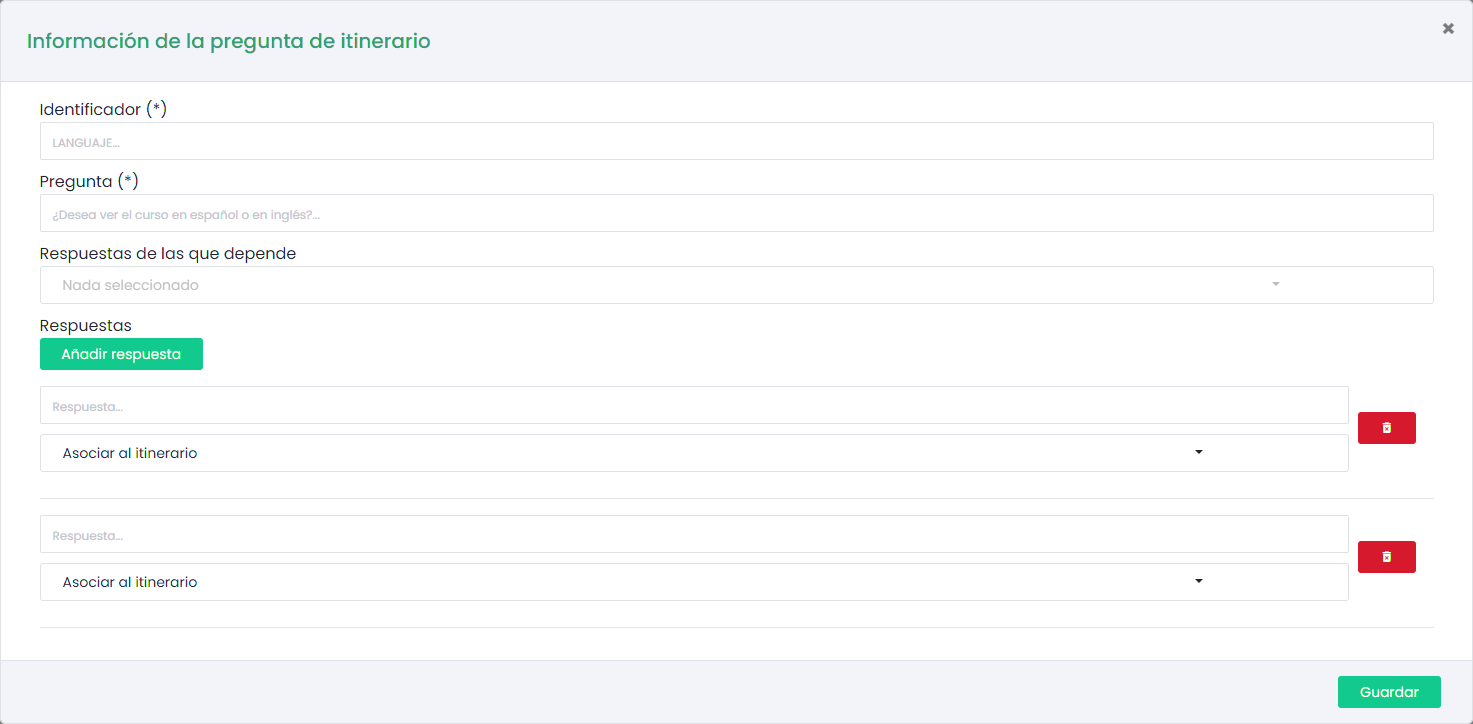
Once the question is defined, configure all possible answers and assign a pathway to each one.
Finally, click “Save”.
Documents

This tool allows us to host reference documents for the student and link them to lessons to be part of the syllabus. It also allows creating folders to organize documents. This tool also keeps a record of visits and downloads made by the student, which can be viewed in detailed course reports.
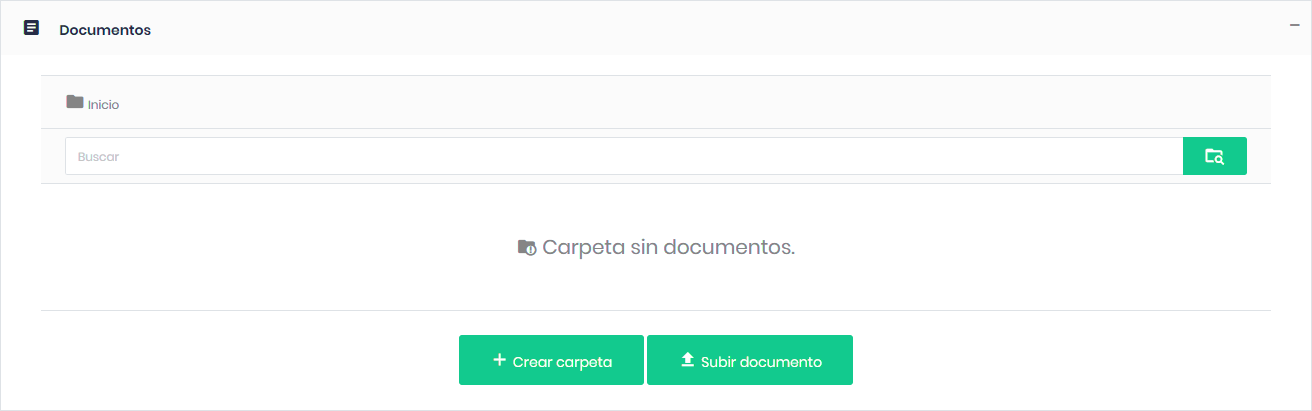
To create folders, click on “+ Create folder”, give it a name, and click on “+ Create”.

To upload documents, click on “+ Upload documents”.
A window will appear where we will select the document to upload and give it a name. Elements in this tool can be hidden so the student does not have access. To do this, click on the appropriate switch.
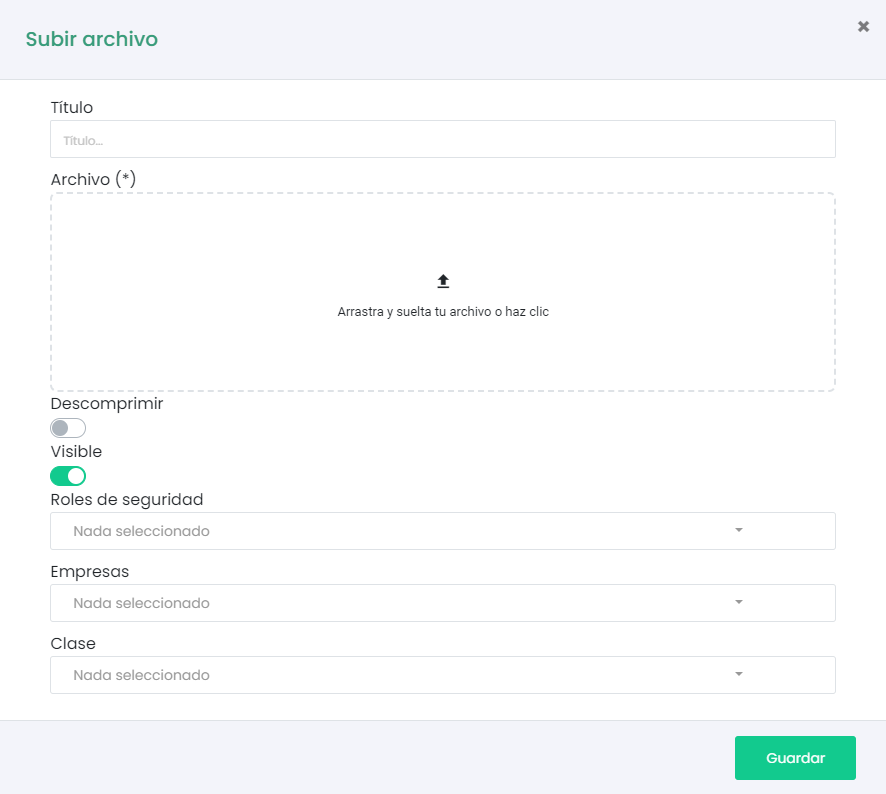
In addition to hiding the document, we can choose which roles, companies, and user classes this document will be available for. This will prevent the user from saving the document on their device or printing it. To do this, activate the lock icon.
Once uploaded, clicking on the edit icon (pencil) will show the link to copy and insert it as a Lesson Component. Additionally, if the file is a PDF, we can block its download and printing.
Communication

This tool allows fluid communication between course users and the course teacher. We have two tools available: forums and chat.
Students assigned to a group will have a private forum and chat exclusively for their group.
Forums

Course forums are a tool that allows contact with other network users and generates communication on various topics. They also serve as an important source of information for inquiries and first-hand advice. Both students and teachers can participate in the forum and share knowledge and doubts.
To create a new forum, click the “+ Create forum” button. The following screen will appear.
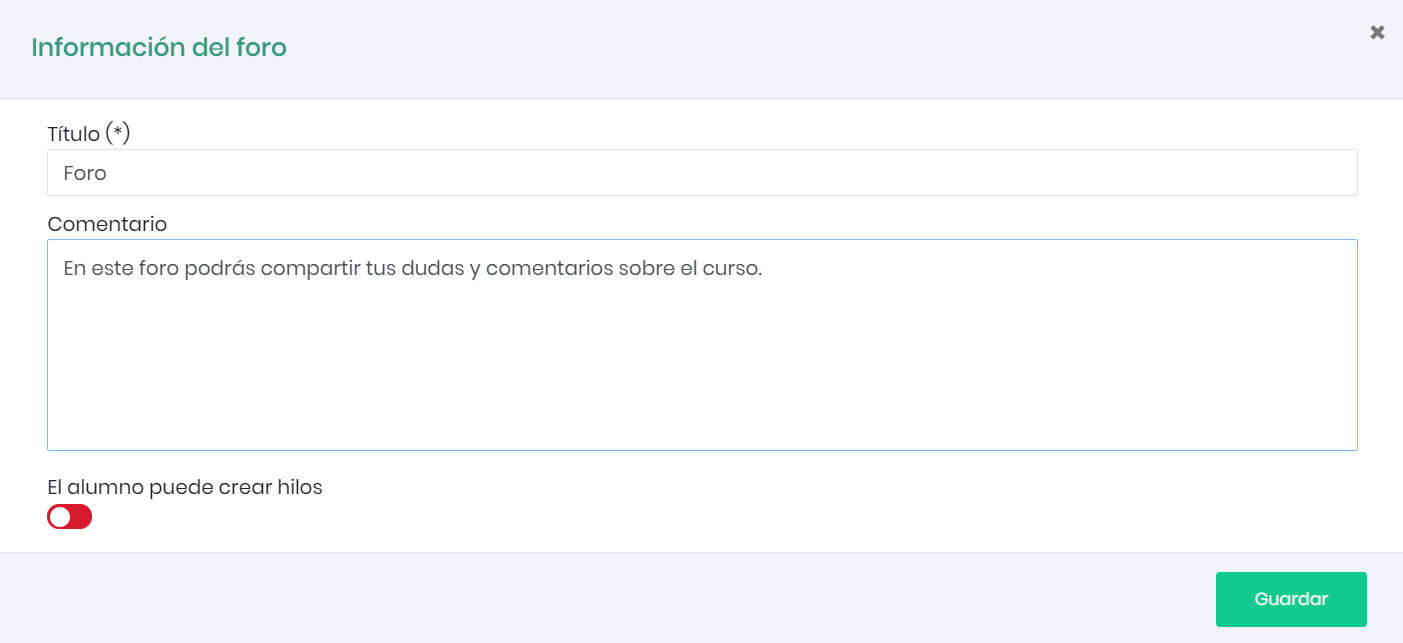
The first thing we need to do is give the forum a title and then provide a brief description of the forum’s functionality in this course. We can also choose whether we want the student user to create threads in the forum or only respond to those initiated by the teacher. More than one forum can be created if desired.
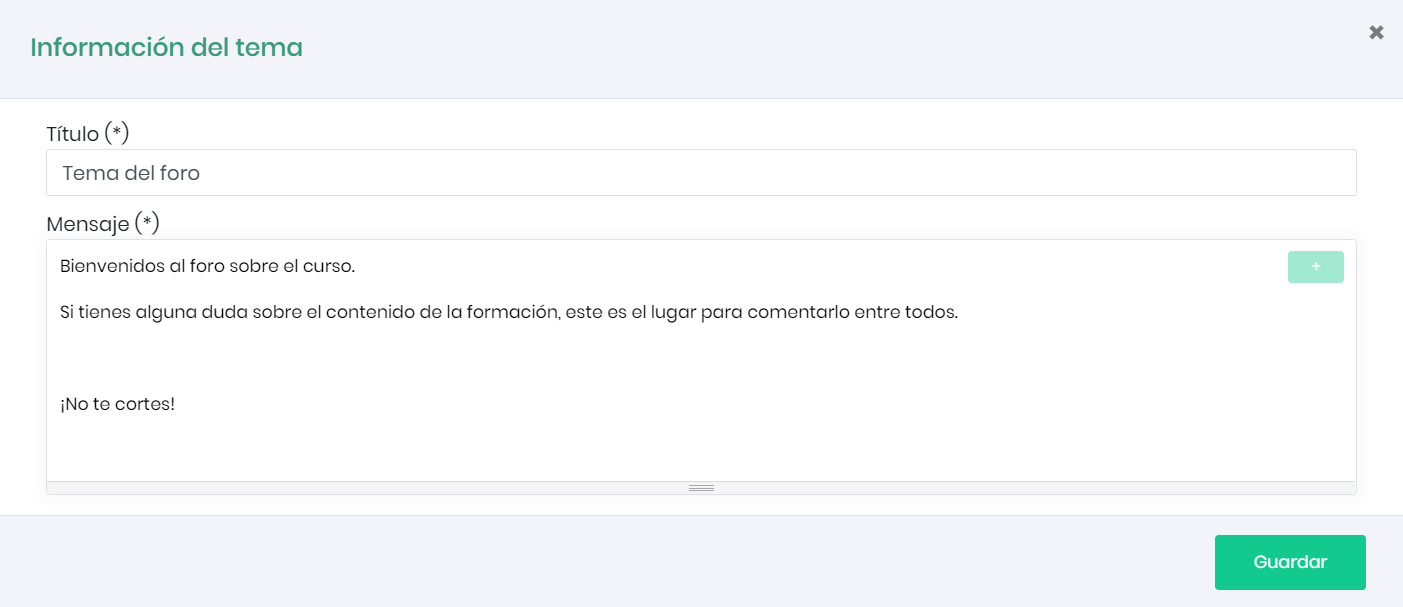
The forum consists of different topics. To create topics, access the forum by clicking on the forum name.

To create a topic, click the “+ Create topic” button. As with creating the forum, give it a title and the message you want to start the forum topic with.
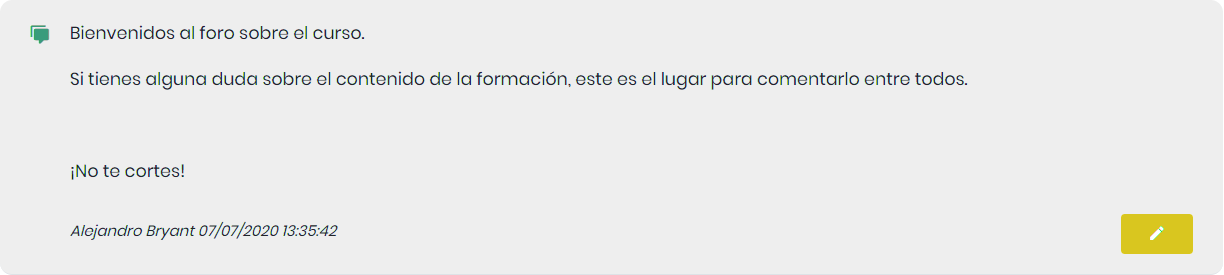
Once we click Save, we can see a preview of the message.
Chat

Chat is an instant messaging service that allows two or more users to communicate in real-time, enabling the sending and receiving of text messages. To enable chat for users, simply activate the switch.
There are two types of chat: private and public chat.
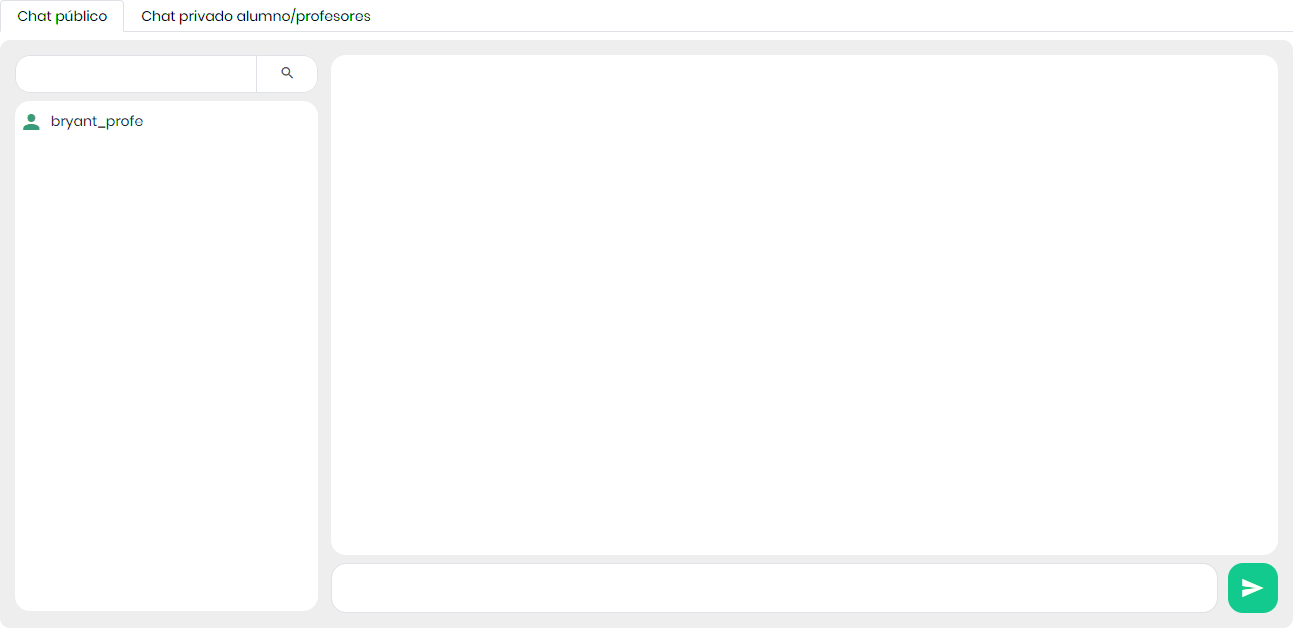
When entering the chat, we will see all the users logged in at that moment and can converse with all of them simultaneously, just like in a group chat.
The course teacher can start private conversations with the desired users. This functionality is useful for discussing private matters and resolving doubts or issues affecting only that user. To start a private conversation, the teacher simply goes to the private student/teacher chat tab and selects “Open new” from the list to choose the user to communicate with. Once the communication starts, the chat will switch to “Open” status.
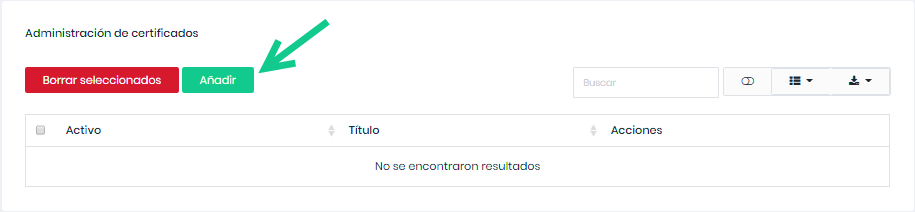
Certificates

Certificates or diplomas are documents automatically generated by the platform when a student completes all the lesson components satisfactorily. The certificate contains a series of tags that will be replaced with real data when generating the certificate. The certificate can be viewed online or downloaded in PDF format.
To access certificates, go to the course tools.
To configure a new certificate, click the “+ Manage certificates” button, and once in the table, click the “Add” button.
First, define the name of the new certificate. If desired, we can select one of the templates previously configured by the administrator. In the upper right corner, we can find a button to enrich the text, add images, and even edit the certificate’s HTML code.
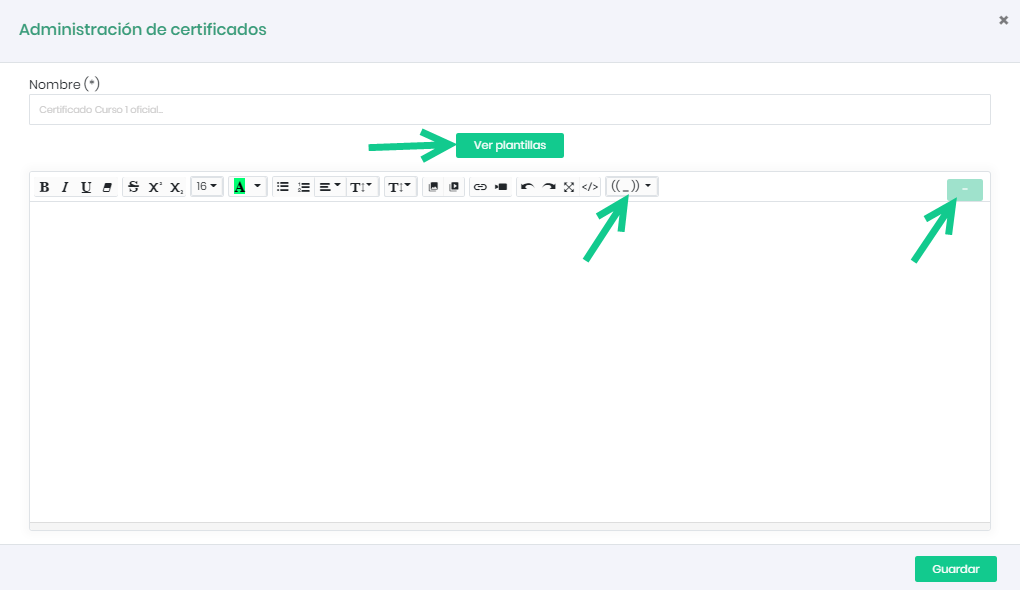
Certificates can contain “variables.” These are texts that, during certificate generation, will be replaced with real data related to the student, course, date, etc. These are the configurable variables:
- User name
- User last name
- Company
- Supervisor’s name
- Supervisor’s last name
- Student code
- Certificate issuance date
- Course completion date without time
- Course completion date without time or day
- Course code
- Course title
- Grade
- Certificate download URL
- Link to the online certificate
- QR code
Finally, click “Save”.

It is essential to have a default certificate (acting as a template) to be automatically generated when the student passes the evaluation. If we have created more than one certificate, we will set the one we will use as the default. To set it as default, click the switch.
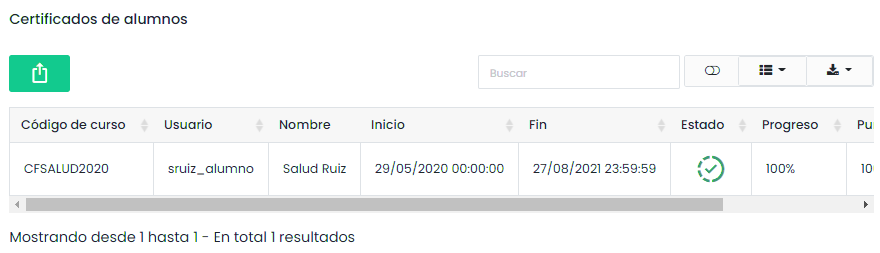
The platform offers the possibility to download student certificates individually from the reports section in the sidebar menu and in bulk from the sidebar menu “Reports > Student Certificates,” using the “Filters” tool.