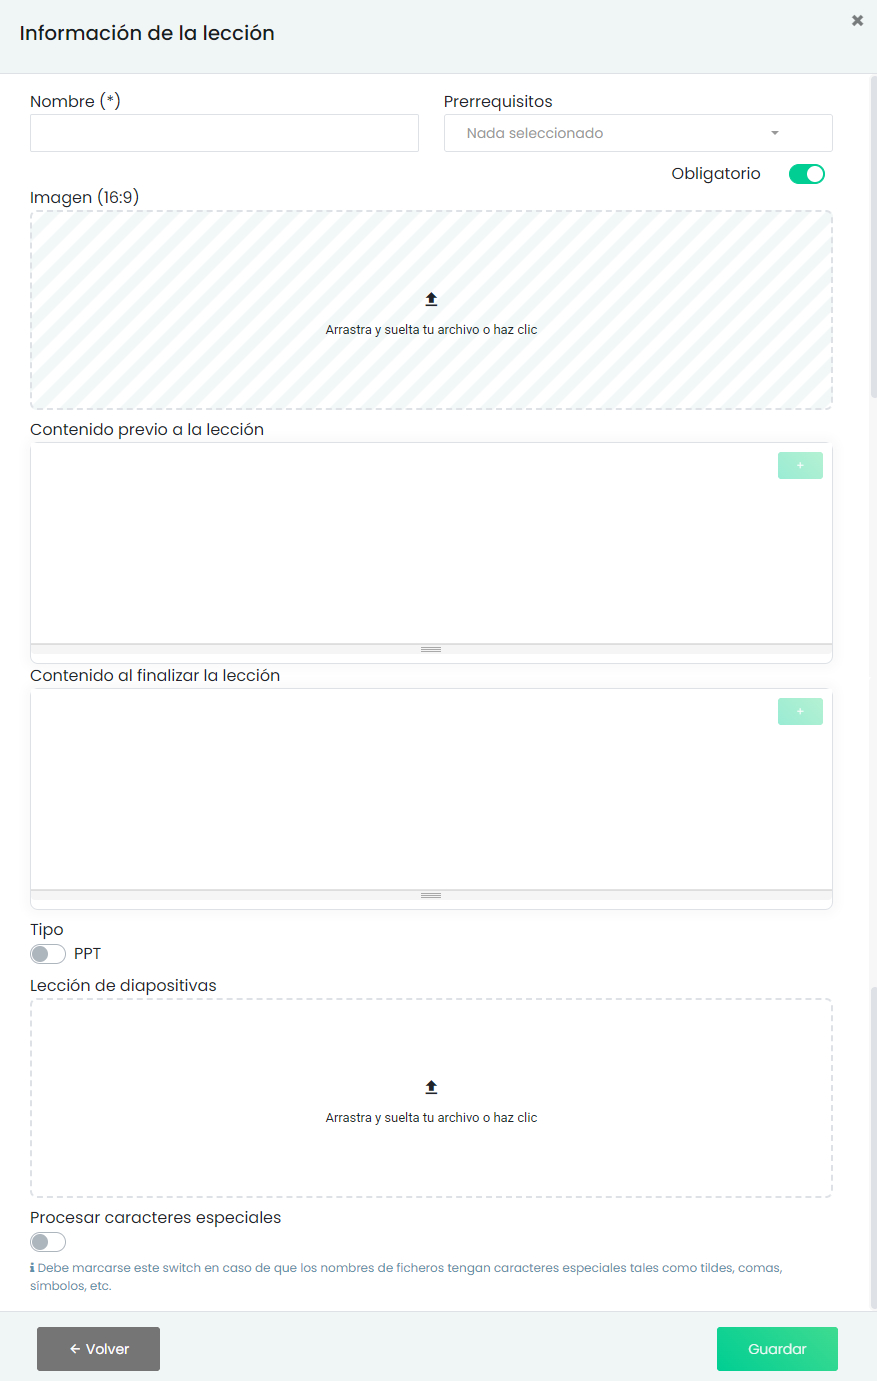
Lesson

The lesson is the basic educational component. It is the component that will contain most of the course information. You can configure as many lessons as you want. There are two types of lessons:

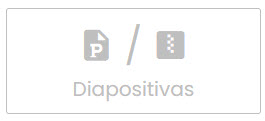
Slide Lesson
The e-xplícate e-learning platform has the unique functionality of generating a lesson component on the platform from a PowerPoint file and automatically associating each audio with its corresponding slide, assigning a time lock to each slide, and generating detailed reports of the student’s navigation through the lesson.
Create a Lesson
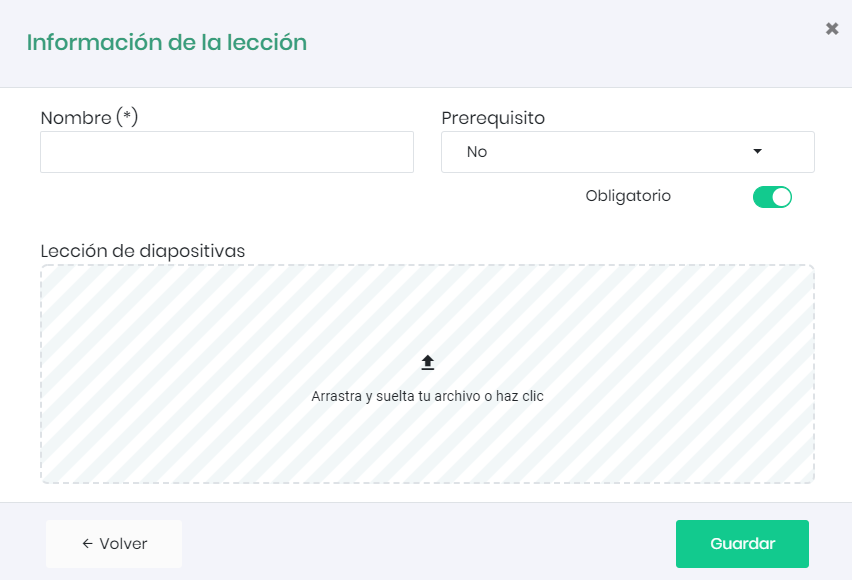
To create a lesson from a .ppt file, click on the Slides icon. The following screen will be displayed.
Currently, the system offers two upload methods:
-
Automatic mode (recommended): direct upload of a PowerPoint file (.ppt/.pptx)
-
Legacy mode: upload via a compressed file (.zip/.rar) containing images and audio files
The file type is selected using a switch on the content upload screen.
NOTICE: It is recommended to use a version of Microsoft PowerPoint 10.0 or higher.
Recommended method: direct PowerPoint upload
You can upload a .ppt or .pptx file directly. The platform automatically:
- Extracts slides as images
- Detects and associates embedded audio
- Generates the lesson structure
- Applies the corresponding playback timings
No prior file processing is required. You only need to name the lesson and set the necessary prerequisites.
Once the file is named, choose whether to set another component as a prerequisite, and click “Save”.
It will take a few seconds to upload the file. After completing the upload, it will be added as a lesson component.
Legacy method: upload via .zip/.rar
This method is maintained for compatibility. We will show how to create a compressed file (.zip/.rar) with images and audio from our PowerPoint file to upload the course to the platform and automatically associate each audio with its corresponding slide.
Inserting a video?
Remember that if you are going to insert a video in the lesson, you must leave a “blank” slide beforehand.
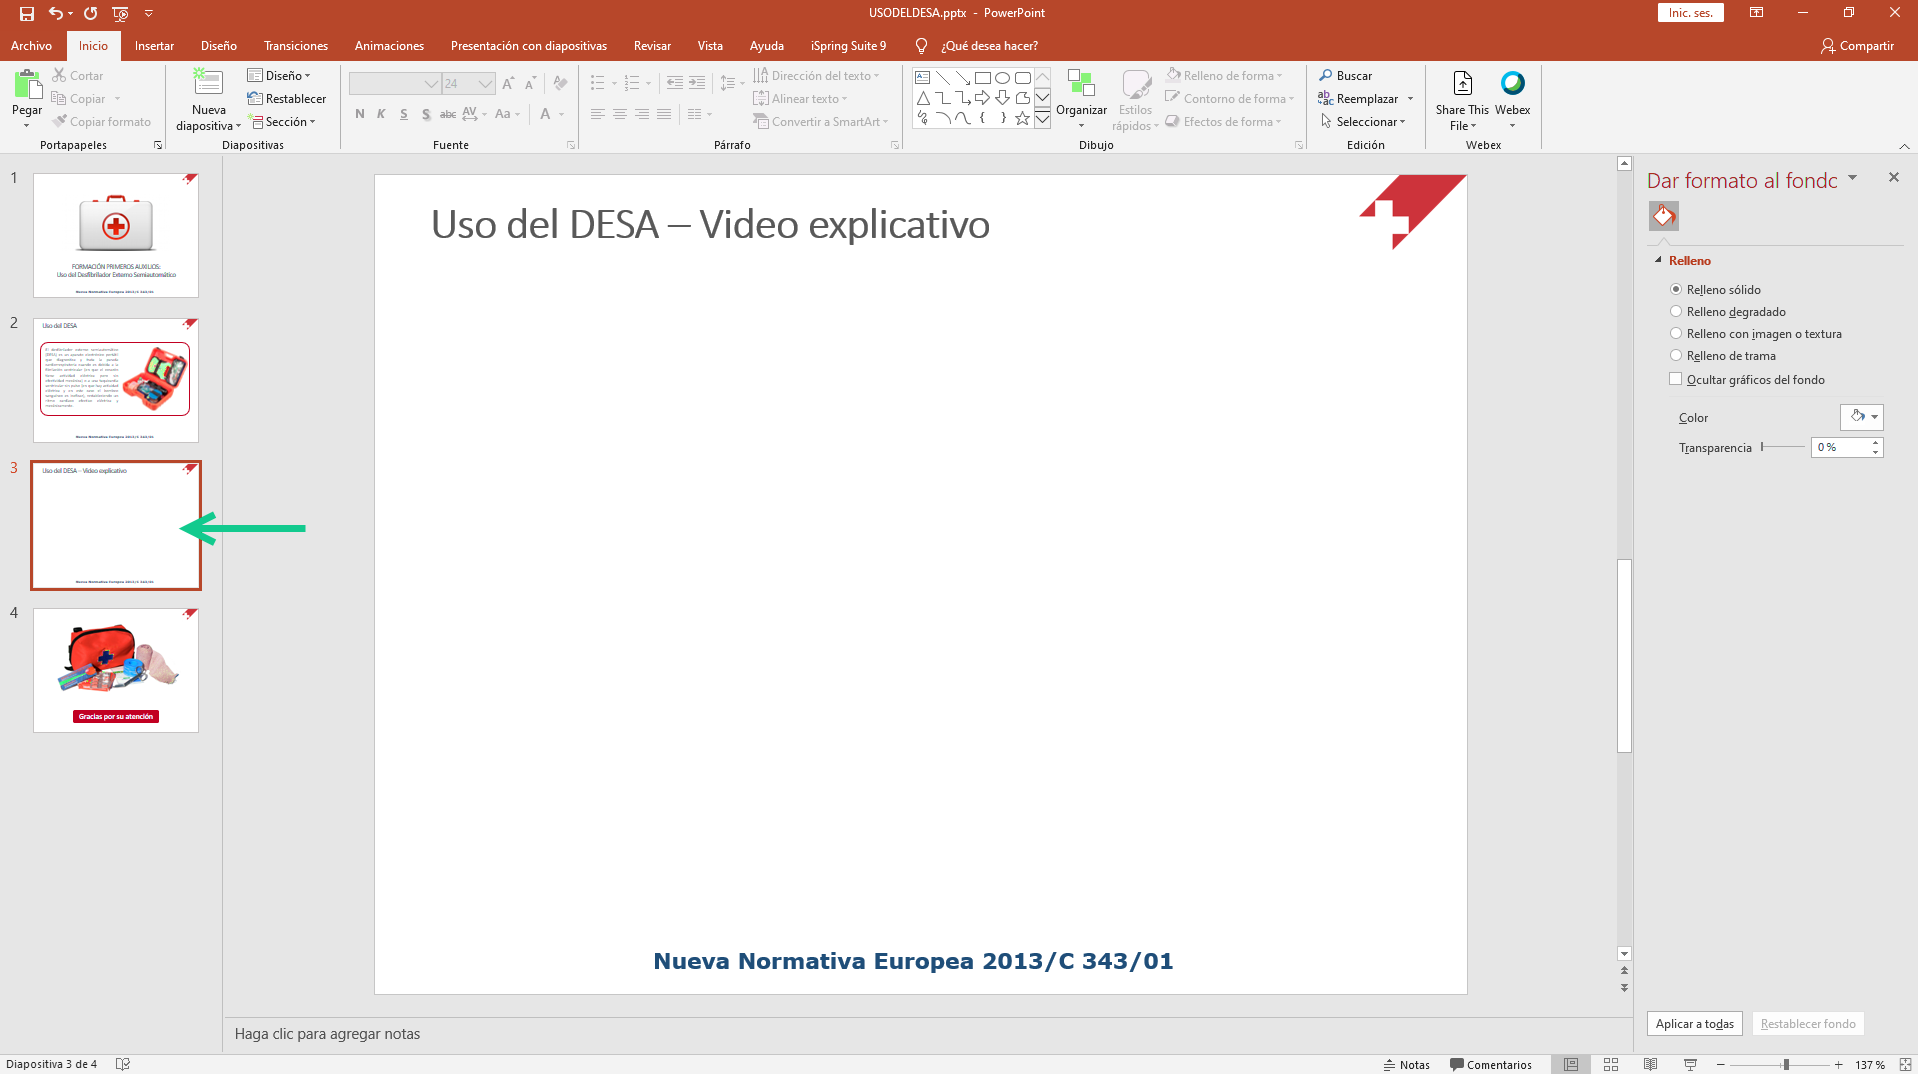
Open your PowerPoint file, select “File > Save As,” and choose the .png format.
Select “Save,” and the following message will appear:
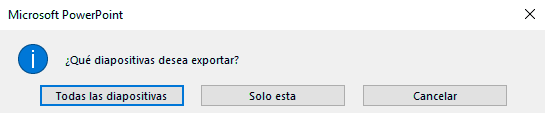
Select “All Slides,” and then “OK.”
The system will create a folder with the same name as the PowerPoint file, where all .png files will be saved.
If the course has audio files, navigate to the folder where they are located, select all of them, and copy them to the folder we just created with the separated images.
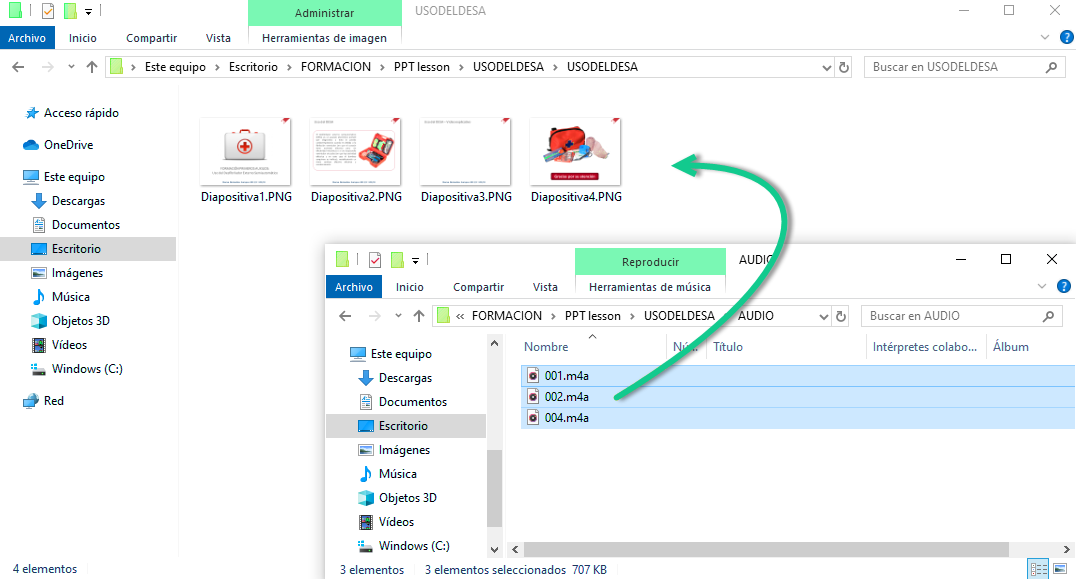
By default, PowerPoint saves the slides in a numerical sequence (Slide01.png, Slide02.png, Slide03.png…). Remember that each audio file must correspond to its slide; for this, they must have the same number in the file name (audio001.mp3, audio002.mp3, audio003.mp3…).
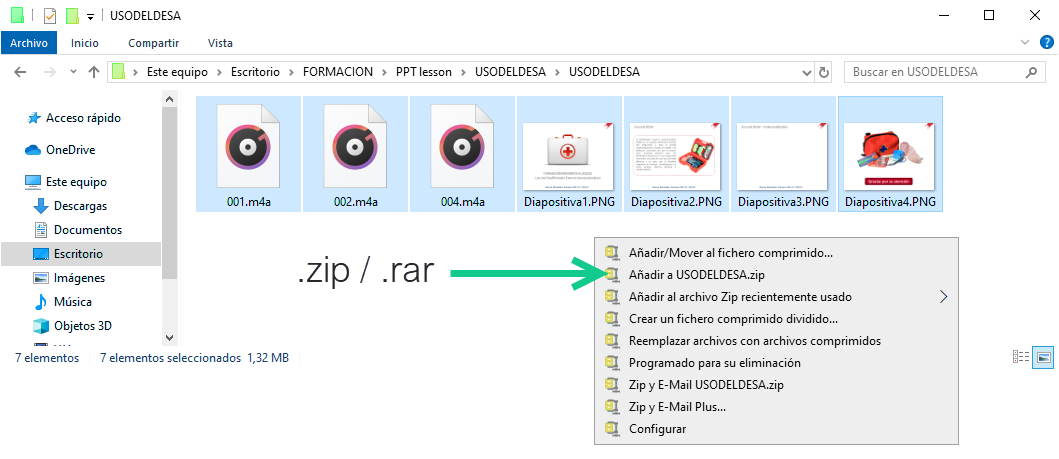
To create a compressed file (.zip or .rar), select all the files in the folder (images and audio), right-click, and select WinRAR or WinZip.
Then select: Add to “lessonname.zip” or “lessonname.rar”.
REMEMBER
To generate the .zip or .rar file, you must compress the image and audio files, not the folder where they are stored.
A compressed file containing all the images and audio will be created in the same folder.
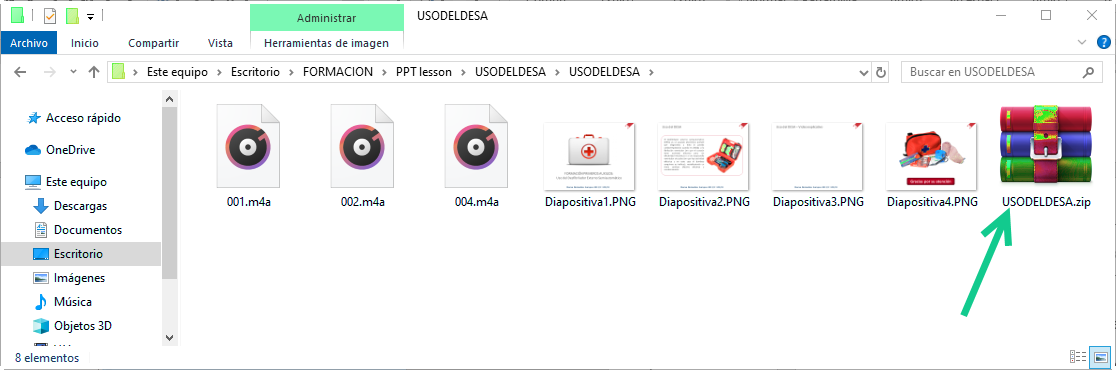
Next, drag the .zip/.rar file to the indicated area:
Once the file is named, choose whether to set another component as a prerequisite, and click “Save”.
It will take a few seconds to upload the file. After completing the upload, it will be added as a lesson component.
Edit a Lesson
Once the component is created, we can edit it to change the content (image or audio), as well as to add a video or HTML elements within the slides. To do this, select the edit icon of the lesson component.

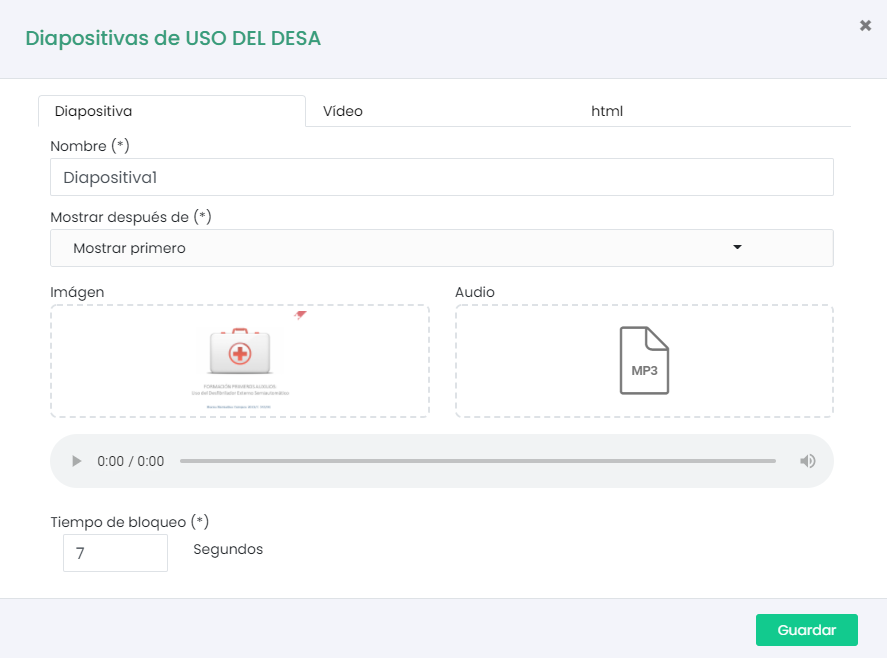
A screen similar to the one for uploading the .zip or .rar file will be displayed but with a new “Edit Slides” button. Click on it.

A table will be displayed where you can select the slide you want to edit. A form with three tabs will open. The first tab is for editing the image or audio, as well as changing the slide advance lock duration and the slide position within the lesson. The second tab is for adding a video and a cover image for it, and the third tab is for editing the HTML code of the slide.
SCORM Lesson

Select the SCORM option and upload the .zip package.
Since it is a complete package, uploading the SCORM is very simple.

Once the file is named, choose whether to set another component as a prerequisite, and click “Save”. If desired, the SCORM lesson score in the course can be edited. To do this, assign a value in the “Weighting” section.
It will take a few seconds to upload the file. After completing the upload, it will be added as a lesson component.