Test

This tool allows configuring different types of questions and offers automatic correction and feedback for students’ answers, which not only saves time for the teacher but also allows the student to self-assess repeatedly.
Creating a new exercise is very simple. First, select the course for which you want to create the exercise. In the “Lessons” dropdown, click the “+Create content” icon and select Test.

The following screen will appear:
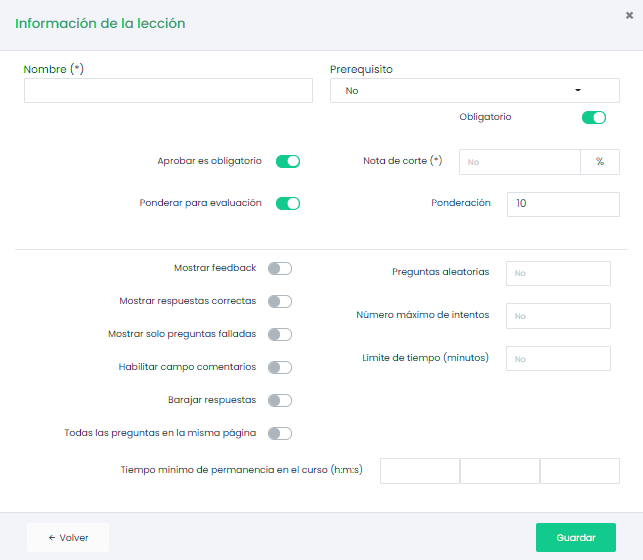
First, you need to give the exercise a name.
In the prerequisites section, you can select a previously created Lesson element, so the exercise will not be accessible until the prerequisite is completed. For example, you could configure it so that the student cannot access the exercise until the rest of the components are completed.
By checking the “Passing is mandatory” box, you will require the user to pass the test to proceed to the next component. You must also define the cut-off score.
By checking the “Weight for evaluation” box, you are configuring this exercise as an evaluation component, and it will have value within the final evaluation result. By checking the box, a weighting section will be enabled where you indicate the score range for the exercise (out of 10, out of 100…).
The platform allows enabling the option to show the user information related to their test attempt upon completion. You can choose whether the user will see their answers and the correct options they should have selected. Additionally, a comments field can be enabled where the course teacher can add comments to each test answer option.
The platform allows generating a predefined number of test questions randomly. All questions will be registered, and you can select how many of them will be shown to the student. You can also choose to randomize the order of the answers for each attempt. This prevents a user from copying answers from another user or a previous attempt.
It is possible to choose whether to display all questions on one page as a list or each question on a different page.
You can also set a time limit for taking the test and a minimum time spent in the course to access it.
Finally, click the “Save” button.
Adding Questions
Once the exercise is a lesson component, to add questions to the test, edit the component with the pencil icon.

The following screen will appear:

To add questions, click the indicated button.
Types of Questions
There are five types of questions.

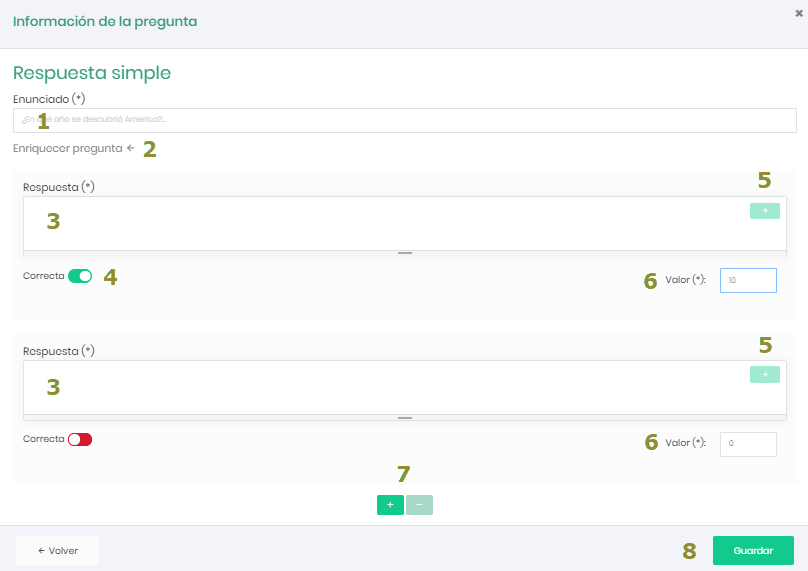
Simple

A single-choice question is one where only one answer can be considered correct. It is possible to assign negative scores to one or more incorrect answers.
Steps
- Insert the question statement.
- By clicking on the Enrich question link, you can add images, etc., to the question.
- Add the proposed answers.
- Select the correct answer.
- You can enrich the answer text using the button in the upper right corner of the answer area.
- Assign a score (positive, negative, or null) to each proposed answer.
- Add or reduce the number of proposed answers.
- Click the “Save” button to finish.
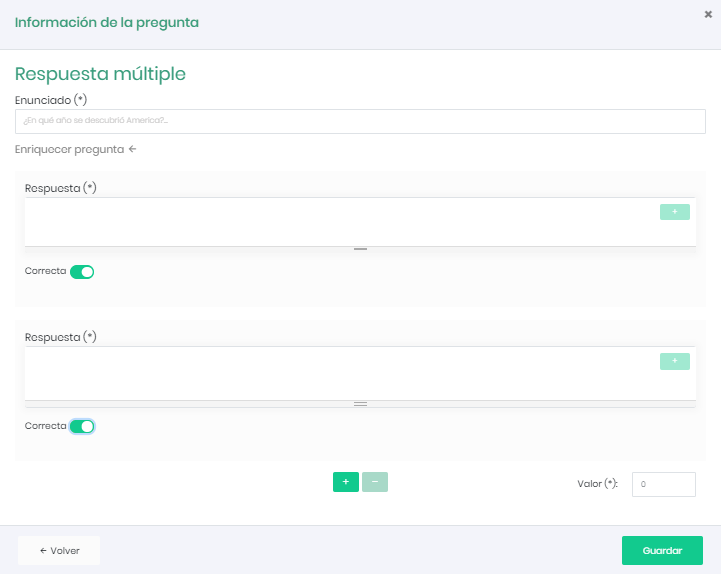
Multiple

This type of question is a variant of the first. It allows you to assign multiple valid answers. Negative scores are possible once again.
Drag & Drop

This type of question is designed to ask the student to match text elements between two or more lists. It can also be used to have a user position elements in a specific order.
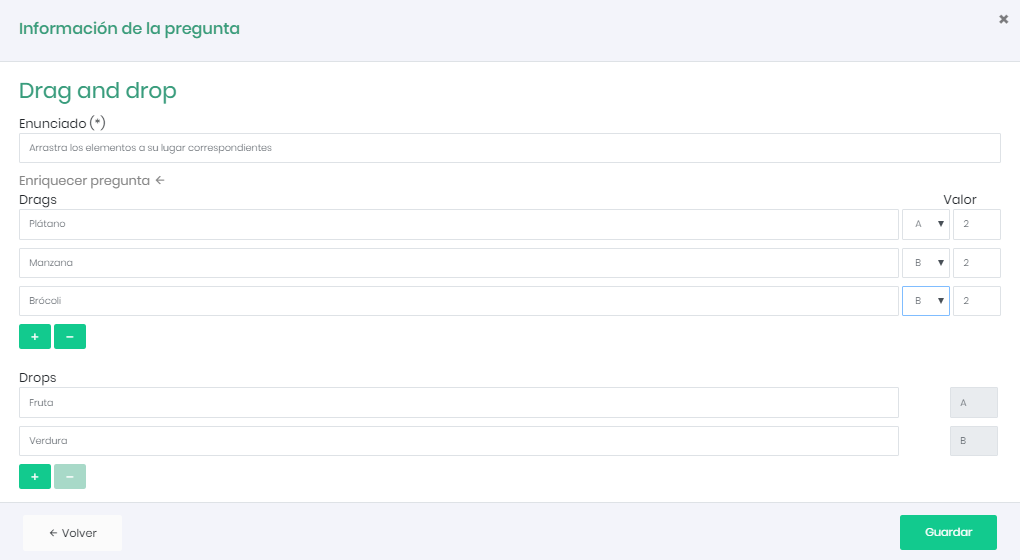
The student will see the question as shown below:
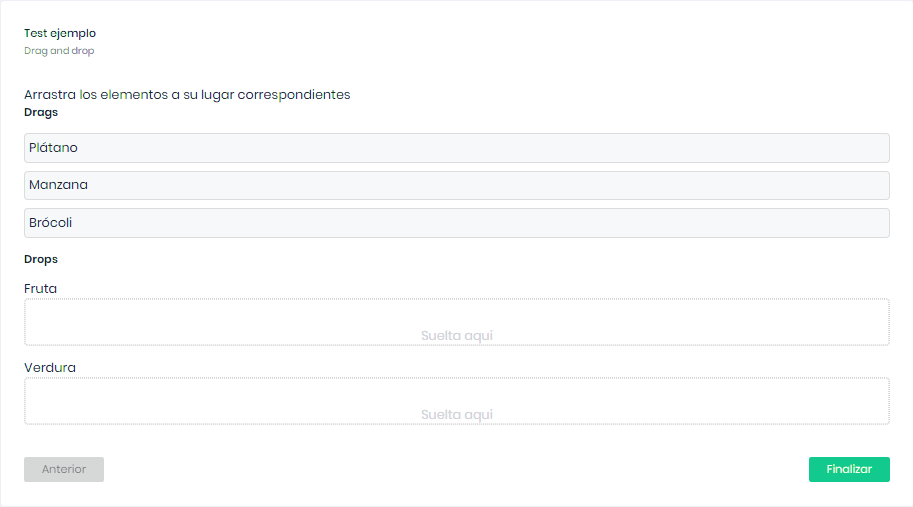
The student must drag the elements to their corresponding place.
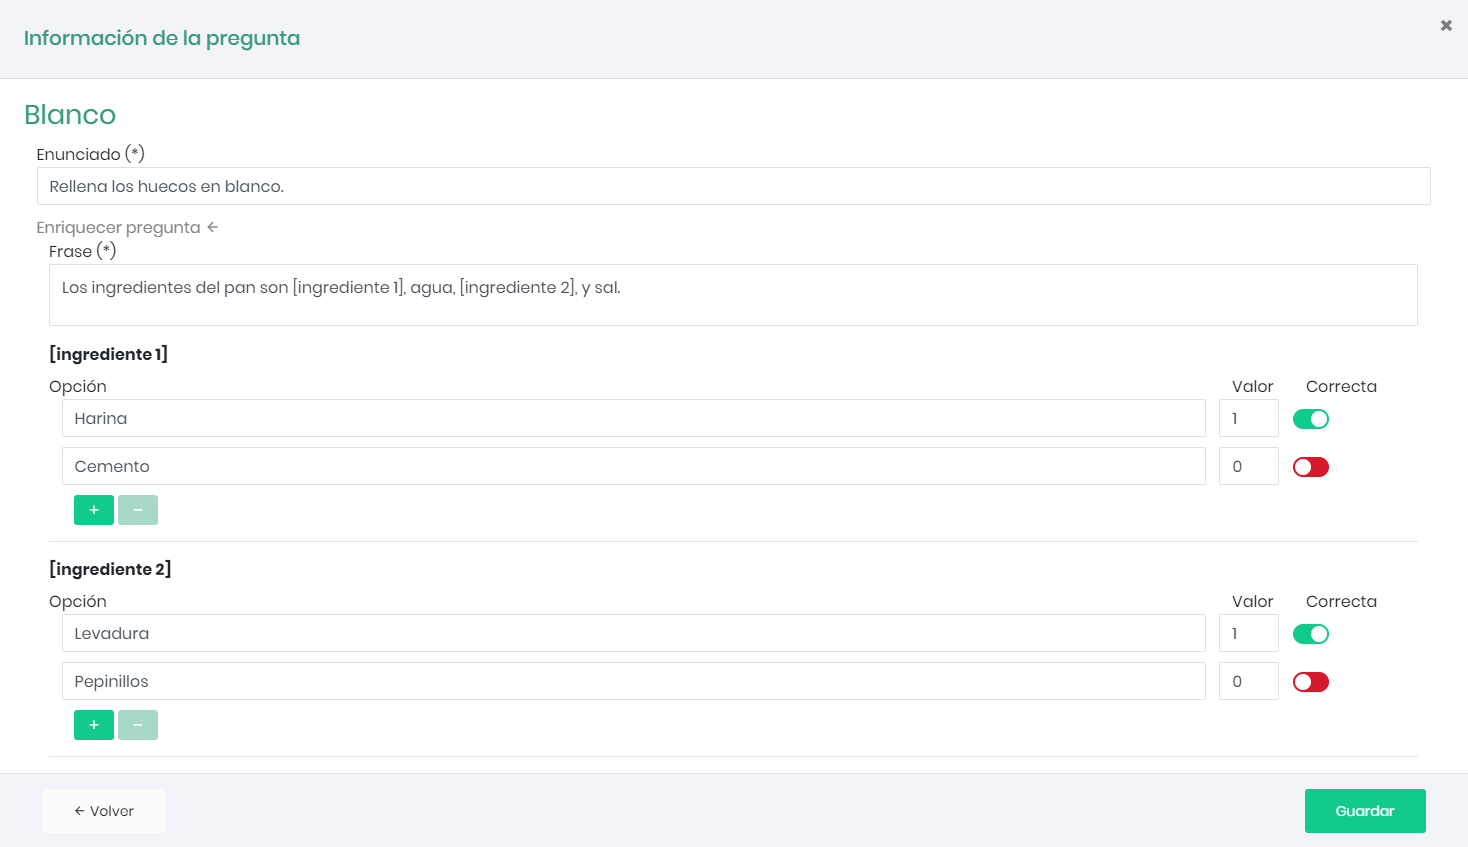
Fill in the Blanks

This is a type of text question with spaces to fill in. The goal is for students to write the words that were previously removed from a text. The first thing the teacher needs to do is write a paragraph (or a list of sentences) and then add brackets (square parentheses) around the words they want to show as blanks in the question (these words will be shown to the student as dropdown inputs, which will be marked correct if the student chooses the word that correctly matches the one defined by the teacher). As soon as the brackets are added, the form will show a “score” field for each word to be evaluated. If more answer options need to be added, use the + and – symbols.
Open Answer

This type of question allows the student to write whatever they want as an answer.
REMEMBER
This test question does not have a single answer, and therefore will not be automatically evaluated at the end of the exercise. It must be manually evaluated by the teacher before the final result of the exercise can be graded.
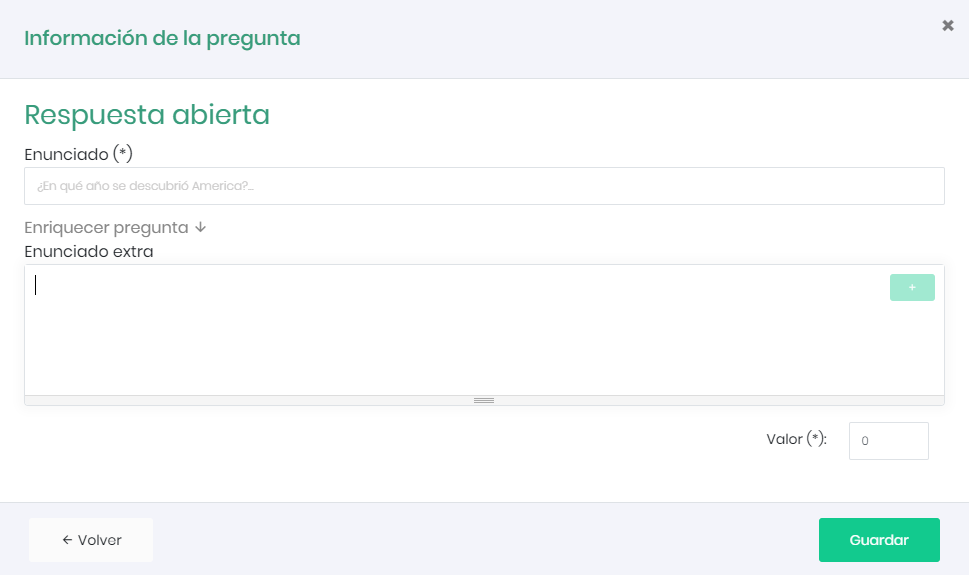
When the student sees the question, they will see a text box where they can write their answer, as shown below (they can use the + button in the upper right corner to use tools that allow them to enrich their answer, such as adding headers, attaching an image, or highlighting text).
Question Categories
This functionality allows assigning a category to each question in the question bank and then defining how many questions from that category will appear in the user’s test.
For example:
We have a test related to a course with three lessons. This test consists of 10 random questions from a bank of 30 questions, 10 per topic. By simple probability, it could happen that all the questions in the user’s test are related to the same topic.
With this functionality, we can assign a topic to each question and set a specific number of questions per topic (or category).