Enrolling a Student in a Course
To enroll students in an already published course, go to the courses section in the sidebar menu and select Administration.
To access the enrollment screen, find the course and click on the icon.

The following screen will appear:
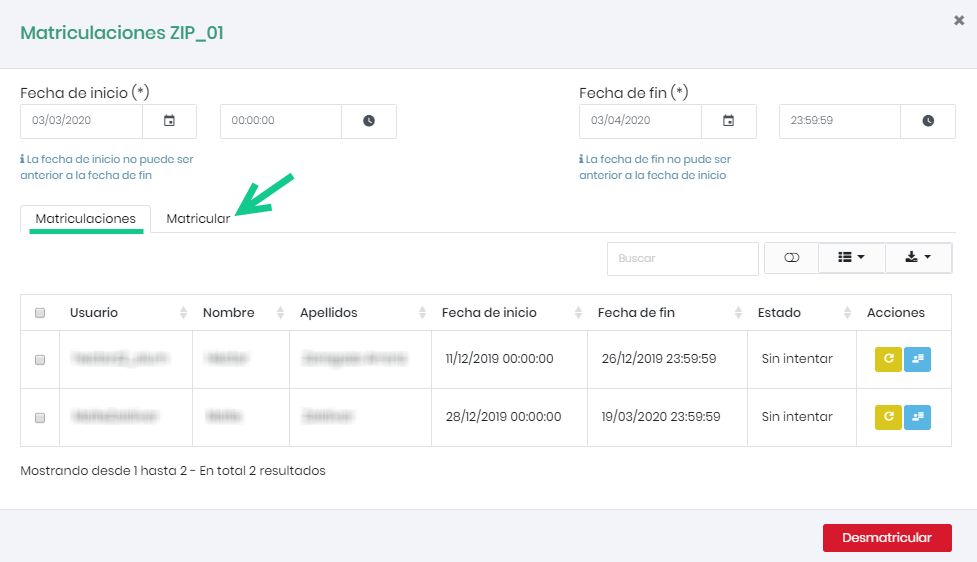
A table with enrolled users will be displayed. To enroll new users, click on the “Enroll” tab. Registered users on the platform will be shown, and we can select which of them we want to enroll in the course. For a more effective search, it is recommended to use the search bar at the top.
By default, the enrollment period will be the one configured when creating the course. If we want to modify the enrollment dates, we can select a start and end date from the calendar.
Once dates and students are selected, click “Add”.
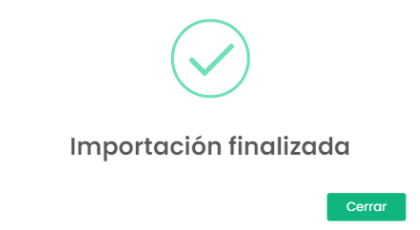
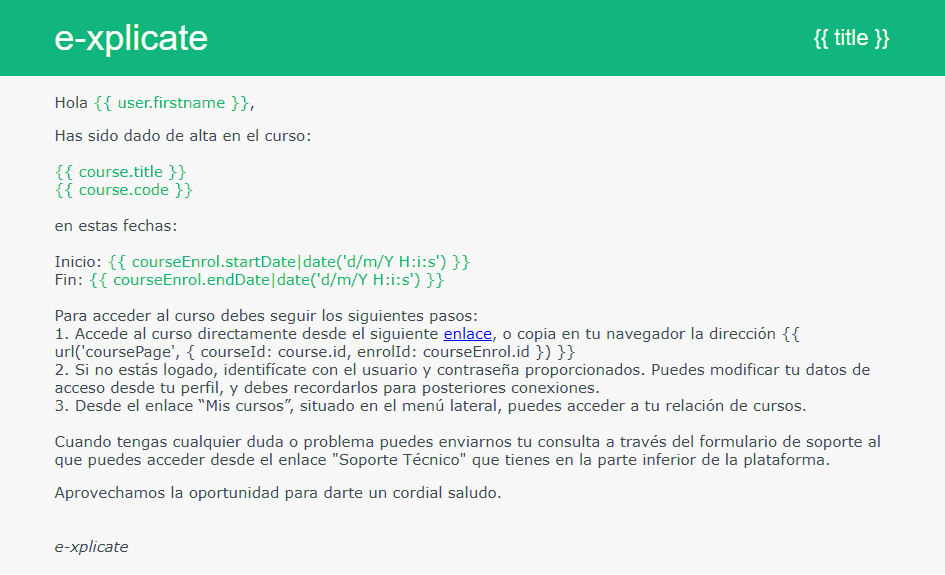
A confirmation message will appear indicating that the process has been executed correctly. Once the students are enrolled in the course, they will receive an email with all the course information (course name, dates…):
Bulk Enrollment
The platform allows enrolling large groups of students through a CSV file. To perform this operation, use the Bulk Enrollment tool located in the Users section of the sidebar menu.
To download the template, click on the indicated button.
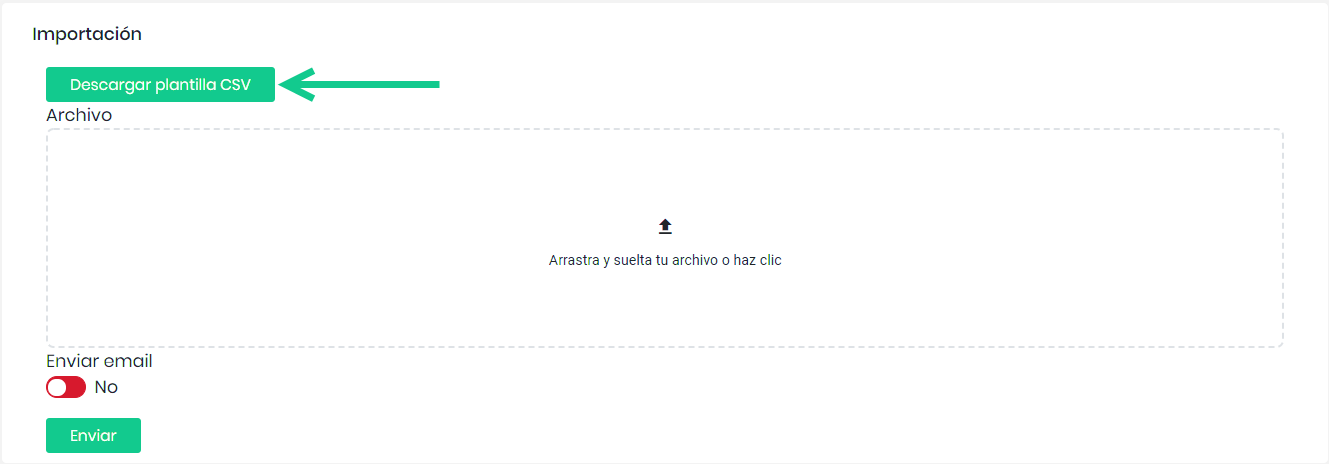
Once the fields are filled out (user, course, start and end dates), simply drag the file from your computer to the drop area and click submit. It is important to maintain the cell format (e.g., dd/mm/yyyy).
You can choose whether to notify users of the enrollment or not.
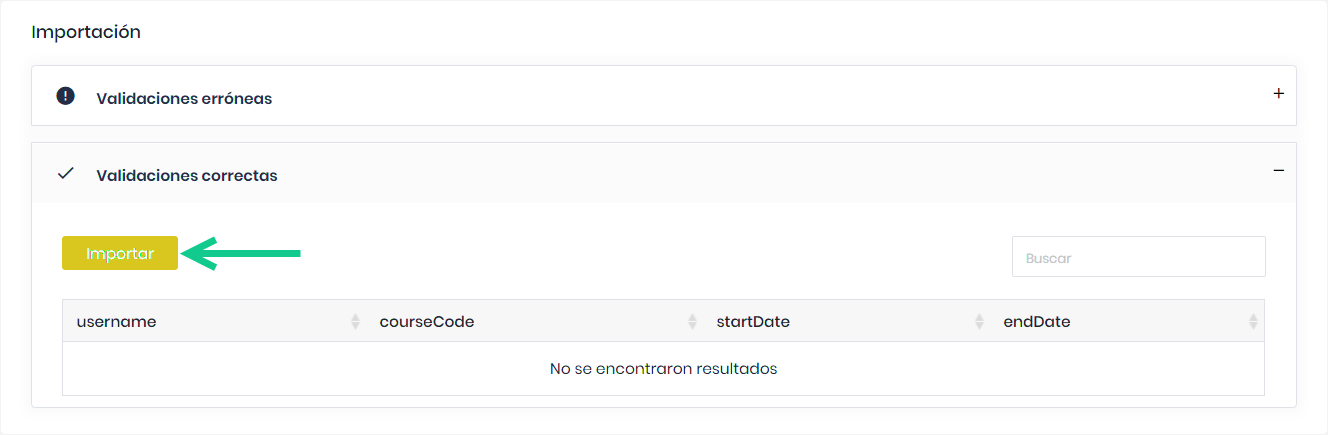
After validation, an error table and a valid records table will be displayed. If we agree, click validate. Otherwise, edit the CSV and repeat the process.
Multiple Enrollment
The platform also allows enrolling more than one user in more than one course manually. To do this, use the Multiple Enrollment tool located in the Users section of the sidebar menu.
The following view will appear.
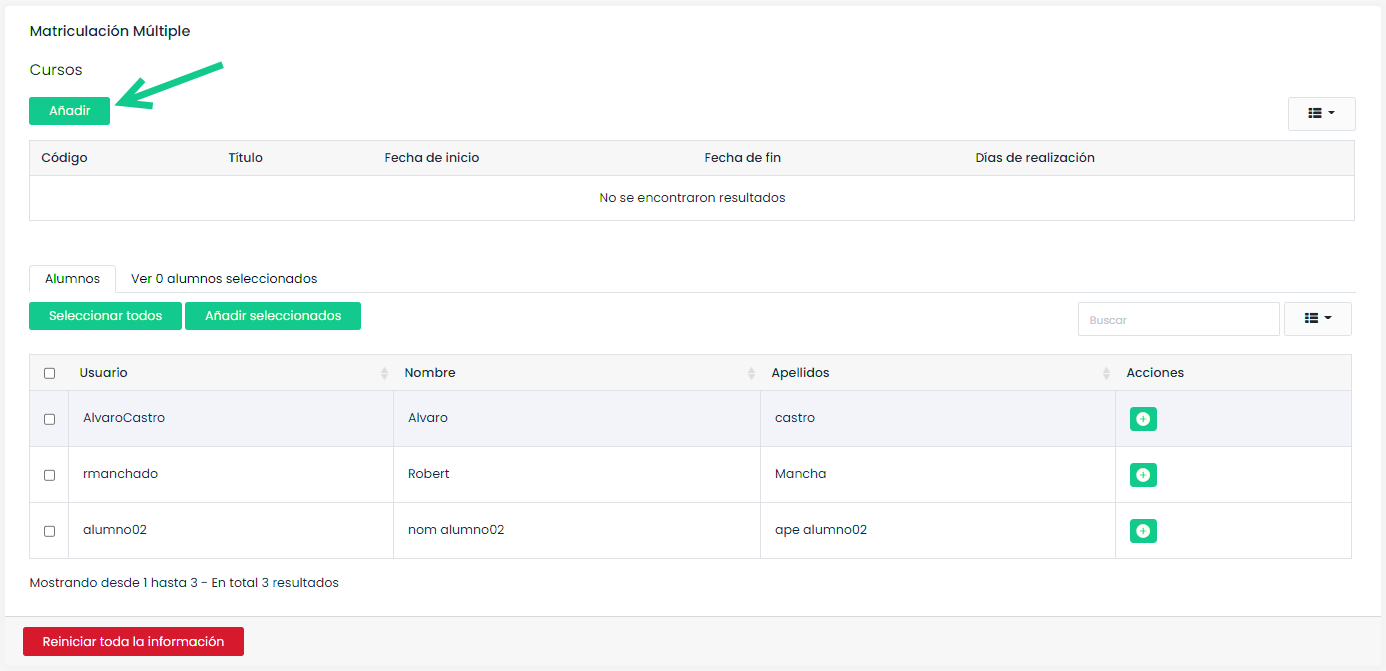
You will notice two distinct sections. The upper section will display the courses you have selected, and the lower section will show the users to be enrolled.
To add courses to the list, click on the add button. A list of courses will be presented, and you can select those you want to enroll in. To select and deselect courses, use the indicated buttons. You can filter courses in the table using the search bar.
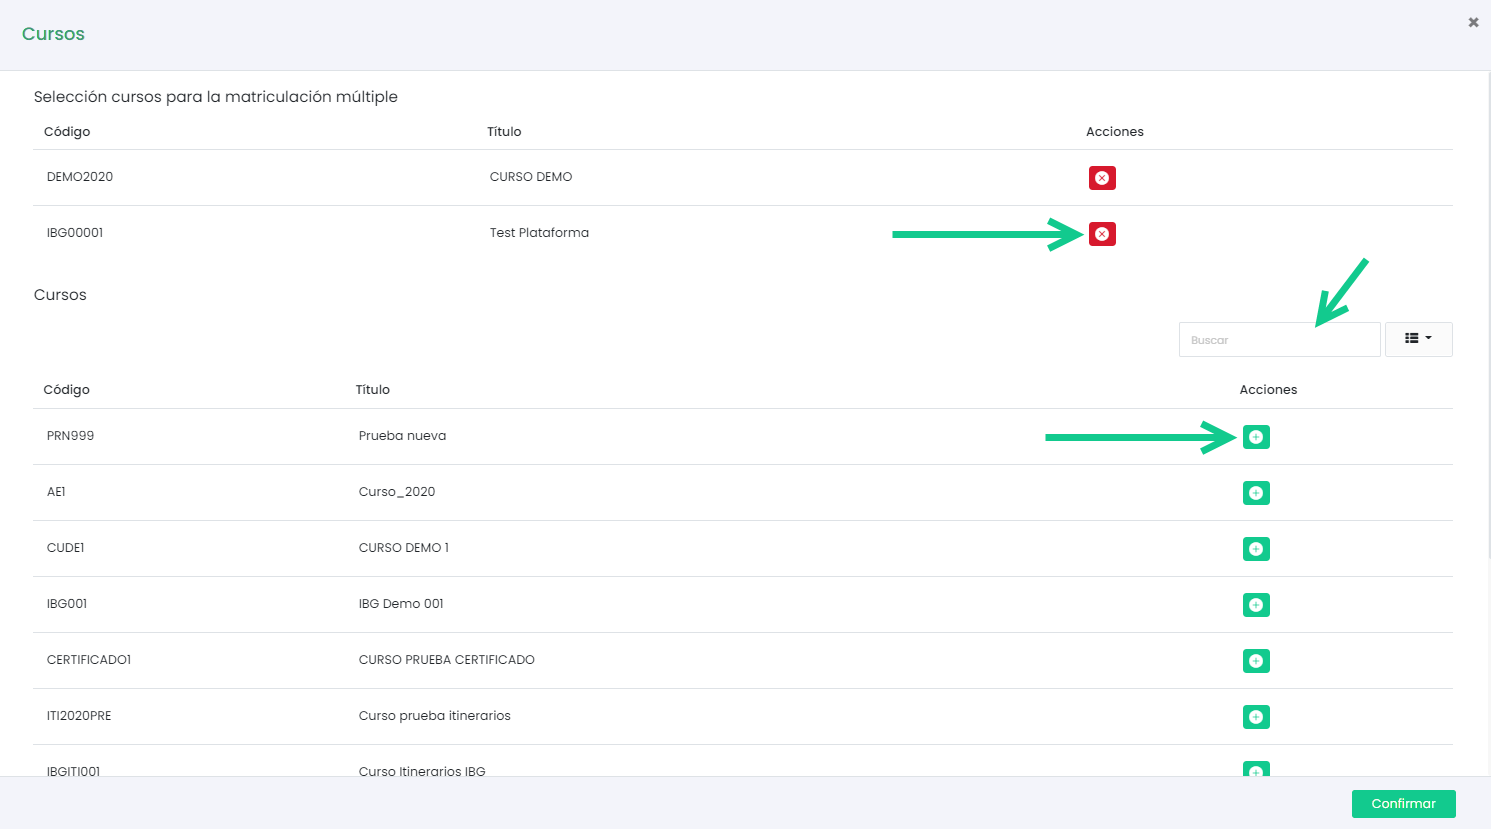
Once selected, click confirm.
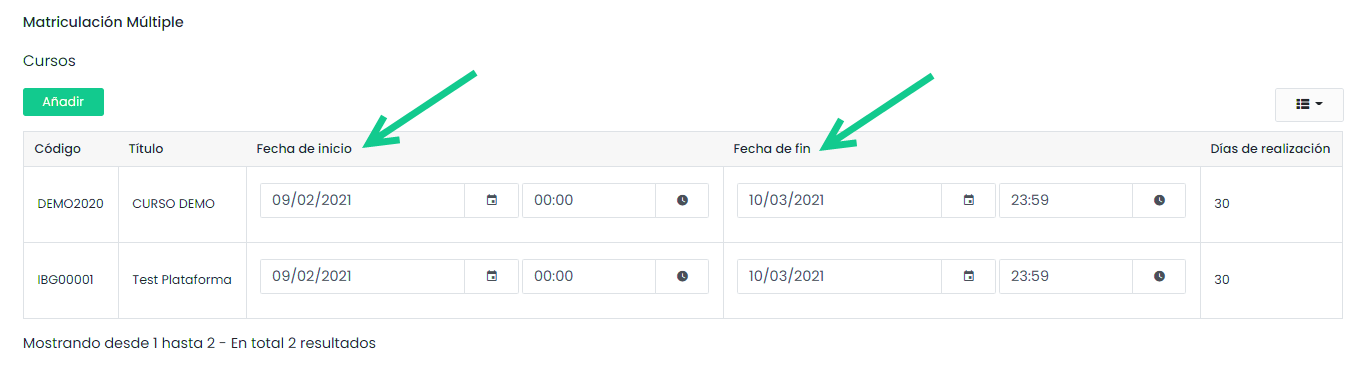
In the course table, select the enrollment dates for each course.
Next, in the users section, you will see two tabs. The first tab will display the students registered on the platform, and you can select which of them you want to enroll in the course(s). To do this, mark them in the table and click on the “Add selected” button.
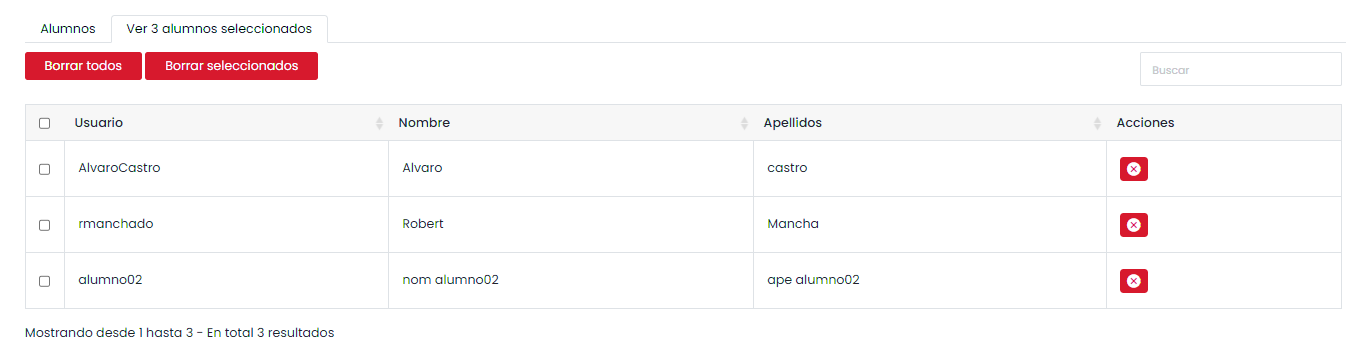
The selected users will appear in the second tab.
If any users are already enrolled in any of the courses, their enrollment dates will be updated if selected. Otherwise, a new enrollment in the course will be created, provided the dates do not overlap with an already assigned enrollment. You can also choose whether users will be notified via email about the new enrollments.

Once courses, dates, and users are selected, click the enroll button.
A confirmation message will appear once the records have been validated.